
Caulking, Weatherstripping, and Insulation: Sealing a Drafty House Without Calling a Contractor

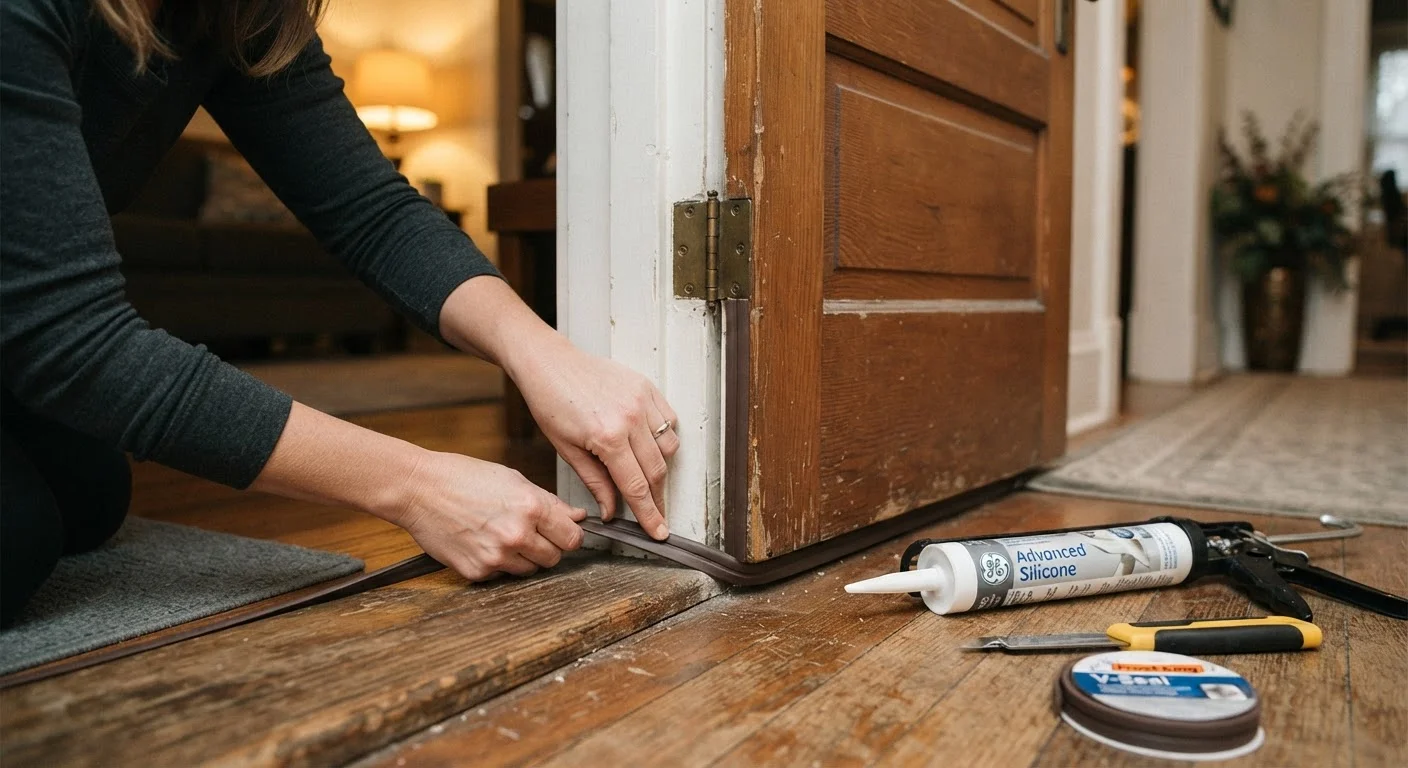
Photo: latesttrend.net editorial
Key Takeaways
- Air leaks around windows, doors, and attic hatches are common sources of energy loss in most homes.
- Caulk works best on stationary gaps; weatherstripping is designed for moving parts like doors and operable windows.
- A candle or incense stick is a simple, no-cost tool for finding hidden drafts before buying materials.
- Most air-sealing projects need only basic tools and materials that cost under $100 for an average home.
- Attic air sealing often delivers larger energy savings than window and door sealing combined.
Why air sealing is worth doing before anything else
Many homeowners jump straight to adding insulation when they feel a cold house in winter. Insulation slows heat transfer through surfaces, but it does very little to stop air moving through gaps. A drafty house can lose a meaningful share of its conditioned air through cracks around window frames, door bottoms, electrical outlets on exterior walls, plumbing penetrations, and attic hatches. Sealing those leaks first makes any insulation you already have perform closer to its rated value.
Air sealing also matters in summer. Hot, humid air pushing in through gaps makes cooling systems work harder and can contribute to moisture problems inside wall cavities. The U.S. Department of Energy notes that air sealing combined with adequate insulation is one of the most cost-effective ways to lower home energy use. For a deeper look at insulation options to pair with sealing work, see our guide to insulation types, costs, and performance.
For most homes, the total material cost to seal windows, doors, and a few attic bypasses runs well under $100. That range is rough; older homes with many penetrations will cost more, and some gaps may require a licensed professional. See our breakdown of DIY repairs versus work that needs a licensed pro if you are unsure where your project falls.
Finding air leaks before buying materials
There is no point buying caulk until you know where the leaks are. On a cold, windy day, move a lit candle or held tissue slowly around window frames, door frames, electrical outlets on exterior walls, baseboards, and any place a pipe or wire passes through an exterior wall. Smoke or paper movement tells you where air is moving.
A few spots that homeowners frequently miss:
- The sill plate, which is the wood framing that sits directly on the foundation wall. This joint is often open to the basement or crawl space.
- Attic hatch edges, especially pull-down stair units, which are rarely insulated or sealed from the factory.
- Recessed light fixtures on the top floor ceiling, which often connect directly to unconditioned attic space.
- The gap where pipes enter or exit cabinets under sinks on exterior walls.
Mark each leak with a piece of painter's tape so you can find it again when you have your materials ready. This is also a good time to decide whether any gap looks like a flue or combustion air opening. If you are not certain, leave it alone.
Do not seal combustion appliance flues
Materials and tools you will need
Gathering the right materials before you start saves multiple trips to the hardware store. The list below covers the most common sealing jobs in a typical home.
What you will need
Caulk gun
Applies caulk in a controlled bead along gaps in stationary surfaces such as window frames and sill plates.
Paintable latex or silicone caulk
Fills and seals stationary cracks and gaps around window frames, door casings, and penetrations.
Foam weatherstripping tape
Compresses to seal gaps on door and window stops where surfaces meet when closed.
V-strip (tension seal) weatherstripping
Fits into the channel of a door or window and springs open to fill gaps as the surface closes.
Door sweep or door shoe
Attaches to the bottom of an exterior door to block the gap between the door and threshold.
Expanding spray foam
Fills large irregular gaps around pipes, wiring, and other penetrations through walls or framing.
Backer rod
A foam rope inserted into wide gaps before caulking to give the caulk something to bond against.
Buying a small tube of each caulk type rather than a full box lets you test adhesion on one area before committing. Weatherstripping is sold by the linear foot in most stores, so measure your door perimeters before leaving home.
Sealing windows, doors, and wall penetrations step by step
Work through the steps in order. Doing the preparation work first prevents wasted material and poor adhesion.
Clean and dry the surfaces around each gap
Caulk and weatherstripping adhesive fail quickly on dirty, damp, or painted-over surfaces. Use a putty knife or wire brush to remove any old caulk, paint chips, or debris. Wipe the area with a dry cloth and let it dry completely before applying anything. On exterior surfaces, do not work in temperatures below about 40 degrees Fahrenheit, since most latex caulks will not cure properly in the cold.
Apply caulk to stationary gaps around window frames and door casings
Cut the caulk tube tip at a 45-degree angle, starting with a very small opening (about 3/16 inch). Insert the tube into the gun, puncture the inner seal with the rod, and apply a steady bead along the gap between the frame and the wall surface or siding. Keep the gun moving at an even pace. Smooth the bead immediately with a wet fingertip or a caulk tool, then let it cure according to the product instructions before painting.
For gaps wider than about half an inch, press a backer rod into the gap first so the caulk has something to bridge against. Without it, the caulk may crack as the house moves seasonally.
Install or replace weatherstripping on door and window stops
Foam compression tape is the easiest product to install: peel the backing and press it firmly along the door stop (the thin strip the door closes against). For a tighter seal on frequently used doors, V-strip weatherstripping lasts longer and handles heavier use. Fold it along the crease so it opens like a V, then press or tack it into the door channel so the open side faces the direction the door closes.
Test the seal by closing the door on a piece of paper and trying to pull it out. If it slides out with no resistance, the weatherstripping is either the wrong thickness or not seated properly.
Add a door sweep to the bottom of exterior doors
Hold a flashlight on one side of the exterior door bottom while a second person looks from the other side in a darkened room. Any visible light strip means the existing threshold seal or sweep is inadequate. Most door sweeps screw directly to the interior face of the door. Measure the door width, cut the sweep to length with a hacksaw if needed, and position it so the flexible flap makes firm contact with the threshold when the door is closed without dragging so hard it prevents easy operation.
Seal pipe and wire penetrations with expanding foam or caulk
Use a straw-applicator can of expanding foam for gaps around pipes, wiring bundles, and conduit that pass through exterior walls or the top plates into the attic. Insert the straw into the gap and fill it about halfway; the foam will expand to fill the rest. Wipe the exterior of the pipe clean before the foam cures, since it bonds permanently to most surfaces. For very small gaps (under 1/4 inch), a simple bead of caulk works fine and is easier to apply neatly.
Match the caulk to the material
Attic air sealing: where the biggest gains often hide
The attic is frequently where air sealing pays off the most, because warm air rises and escapes through every gap it can find at the top of the building envelope. Common bypasses include the tops of interior walls (which are open to the attic in most stick-framed homes), gaps around recessed lights, and any chase where a plumbing vent or flue pipe passes through the ceiling.
Blocking these with rigid foam board scraps or fire-rated acoustic sealant (for gaps near heat sources) can reduce air movement substantially. However, attic work has safety considerations that do not apply to window and door sealing.
Attic work near insulation: safety first
Attic air sealing is a natural companion to adding blown-in insulation, which is itself a project many homeowners do themselves after renting a blower machine from a hardware store. For broader context on keeping a home in shape without large repair bills, our guide to preventive maintenance tasks covers the habits that matter most.
If your budget for the year is limited, consider tracking air sealing alongside other planned maintenance in a simple annual fund. Our first-time homeowner budgeting guide explains how to build a realistic maintenance reserve.
The content provided on our blog site traverses numerous categories, offering readers valuable and practical information. Readers can use the editorial team’s research and data to gain more insights into their topics of interest. However, they are requested not to treat the articles as conclusive. The website team cannot be held responsible for differences in data or inaccuracies found across other platforms. Please also note that the site might also miss out on various schemes and offers available that the readers may find more beneficial than the ones we cover.